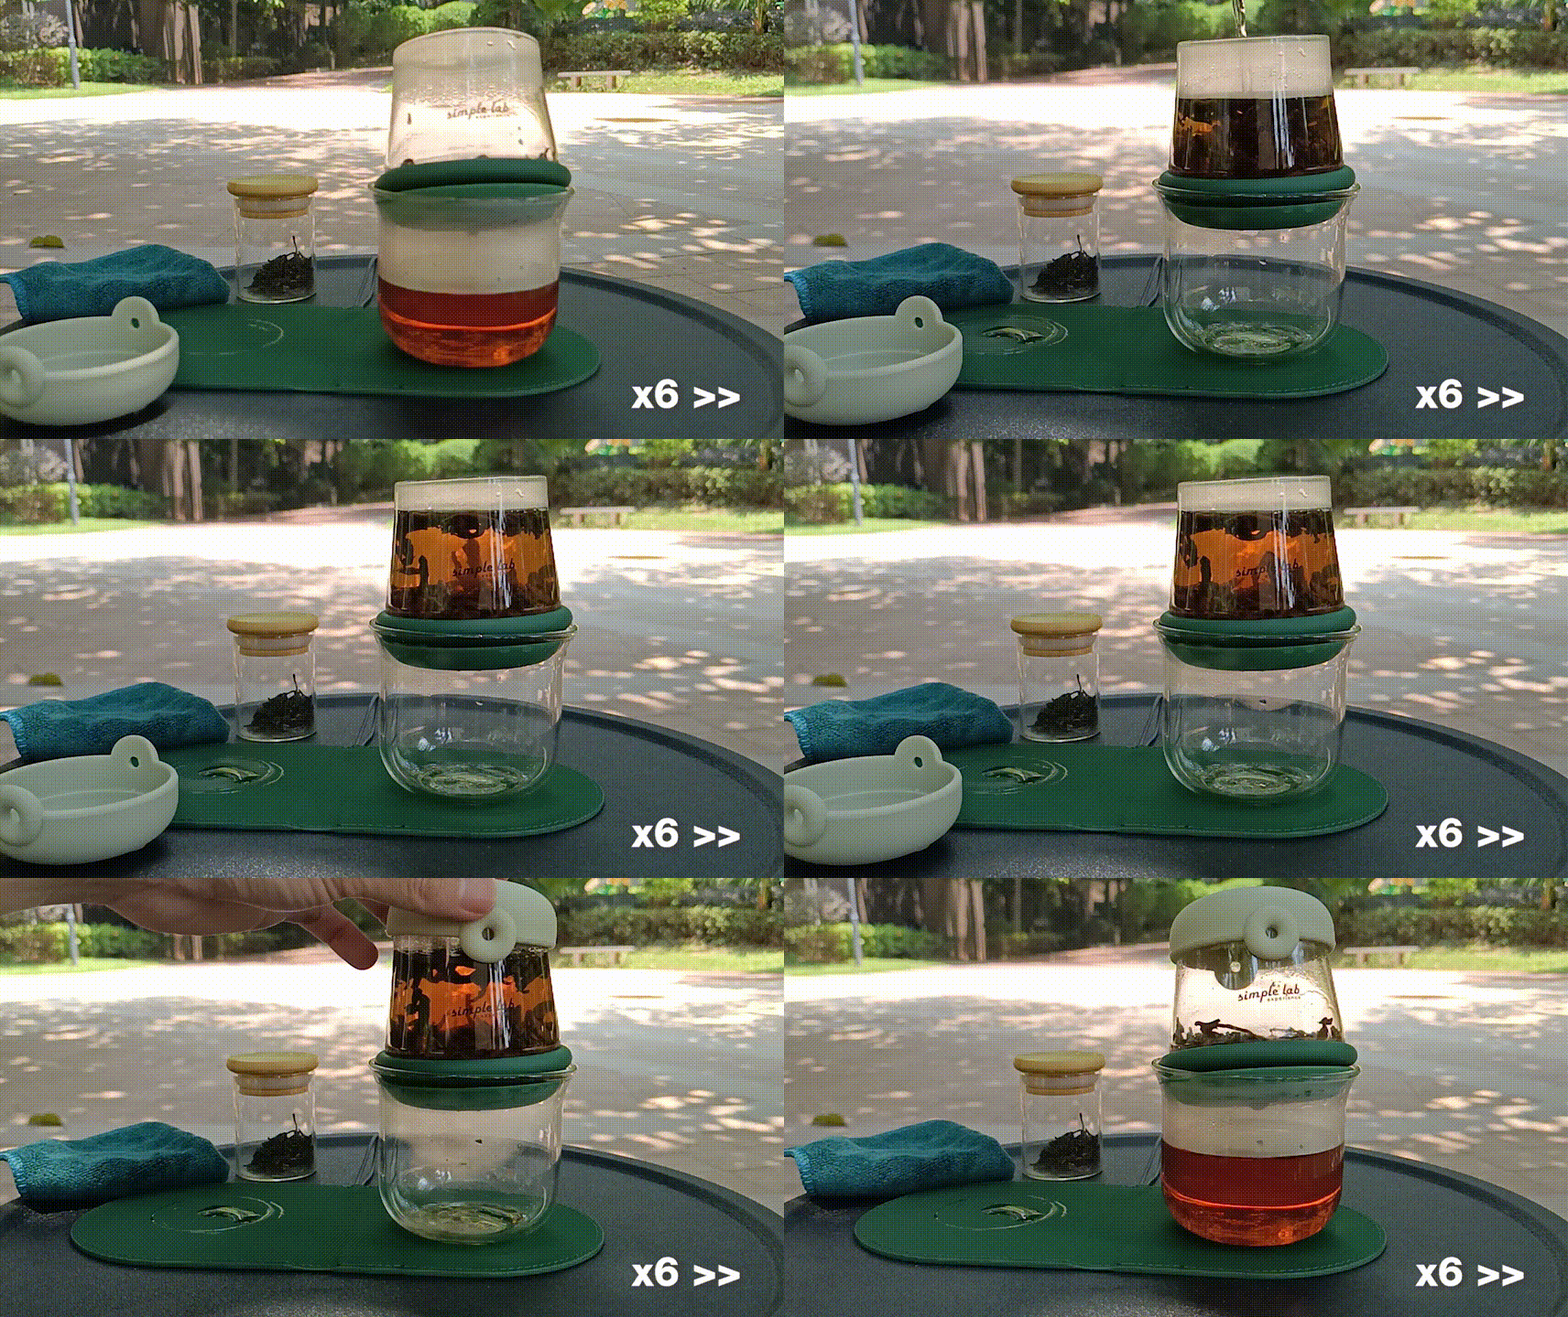

AIRO-mini
Magic Tea Brewer
User Guide

General Tips
01
Wash with Mild Detergent Before First Use
We recommend washing the AIRO-mini components with a mild detergent before using it for the first time.
03
Gently Press the Upper Brewer
Before pouring in the hot water, give the upper brewer a gentle press to ensure a tight seal.
05
Grip the Lower Glass Rim
When drinking your freshly brewed tea, grip the rim area of the lower glass with your fingers to avoid burning your hands.
07
Avoid the Center Mesh Area While Pouring
This allows the expanded air in the lower glass to escape freely through the mesh without pushing up the upper brewer.
02
Position the Upper Brewer Level
Make sure to place the upper brewer in a level position to achieve the best sealing effect and prevent leaks.
04
Brew Around 150ml at a Time
For the optimal brewing experience, we suggest brewing around 150ml of tea at a time, just above the “simple lab experience” logo.
06
Pre-heat the Lower Glass Before Brewing
Pre-heating the lower glass can improve the sealing effect.
08
Use the Grey Silicone Cap
If the upper brewer feels too hot to handle, use the provided grey silicone cap.
Be careful
Stainless-Steel Filter Edges
Be cautious when handling the stainless-steel filter, as it has sharp edges that could potentially cause cuts or scratches.
Hot Water While Brewing
Exercise caution when brewing, as the hot water used can pose a burn risk. Avoid direct contact with the hot water.
Broken Glass Edges
In the unlikely event that the glass components break, Avoid the sharp edges that may be created to prevent injury.
AIR-LOCK
It is important to wash AIRO-mini with mild detergent before the first use. Try not to dry it with a towel, as there might be leftover fibers that may affect the sealing effect.

In most cases, the air-lock effect can be achieved by placing the upper brewer level. A gentle press on the upper brewer will further secure the locking effect.
If that doesn't work, please pre-heat the lower glass by rinsing it with hot water and then pouring it out.
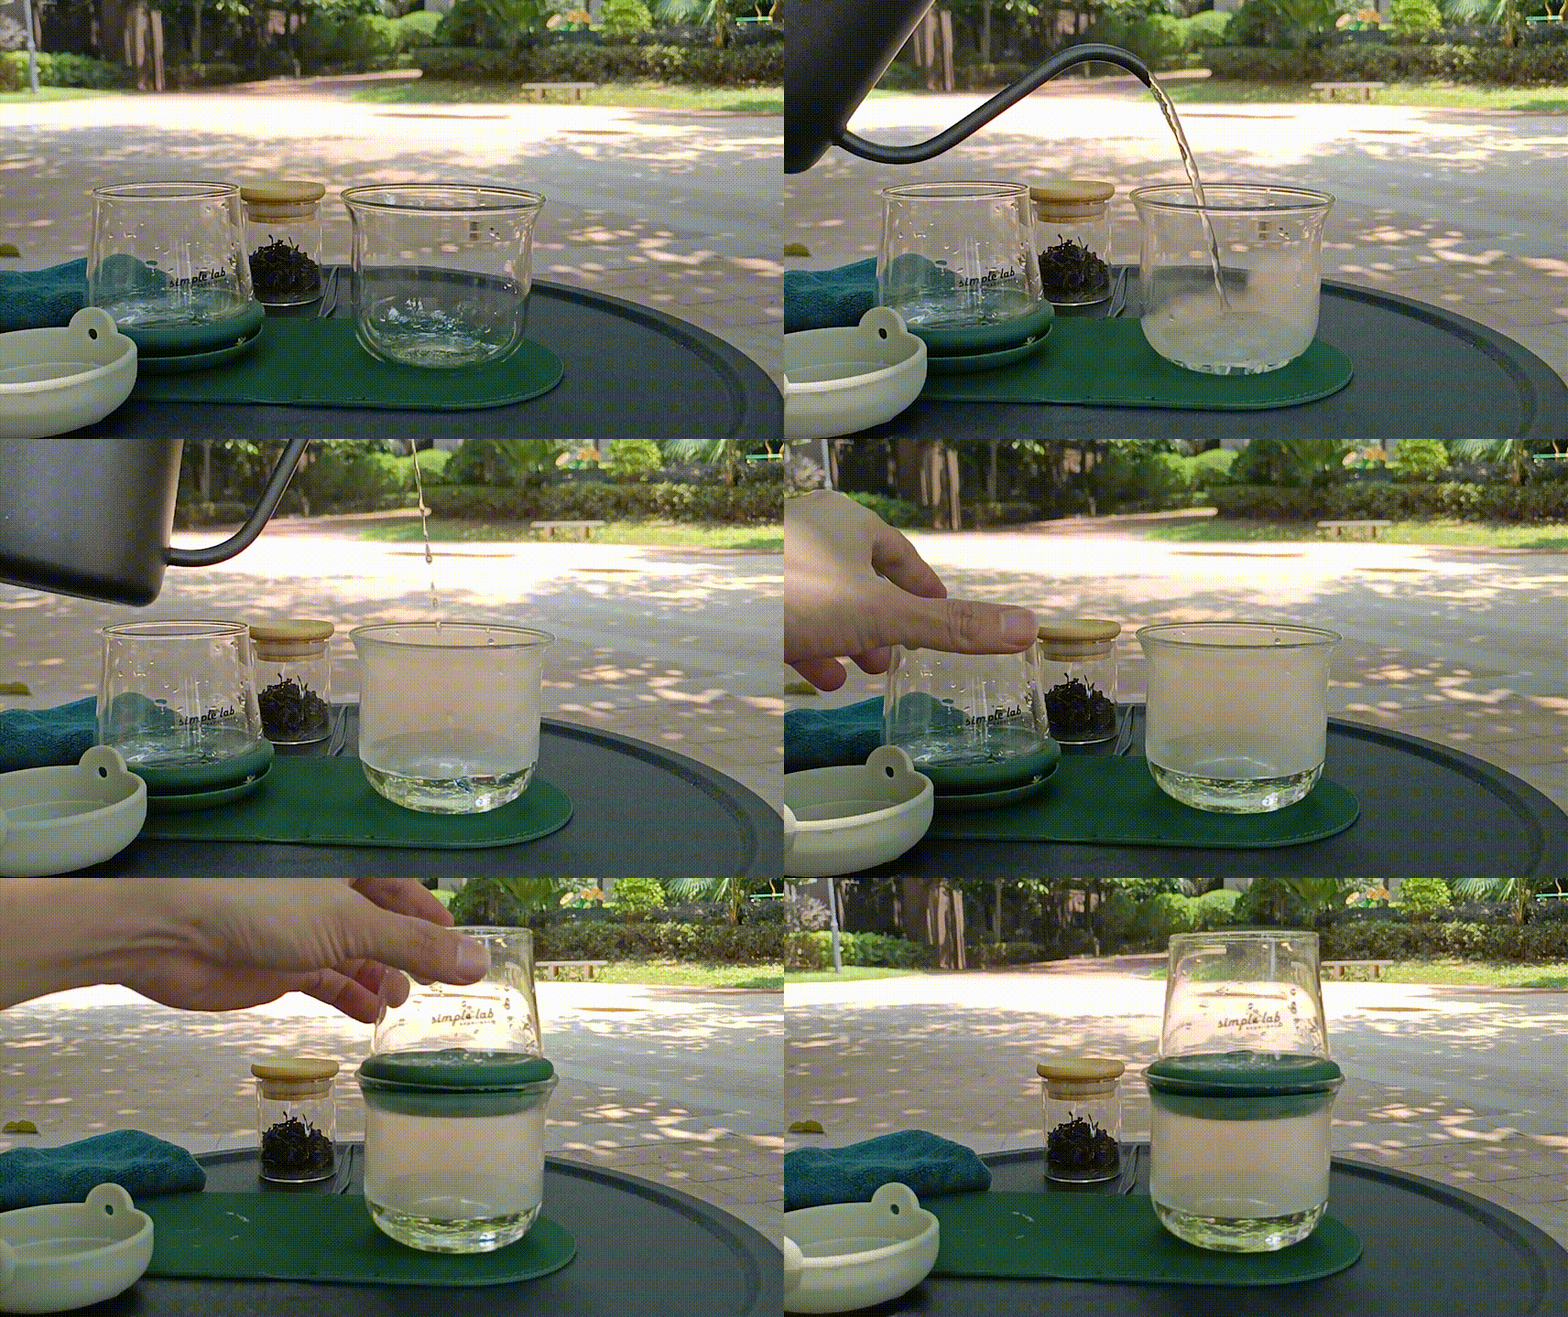
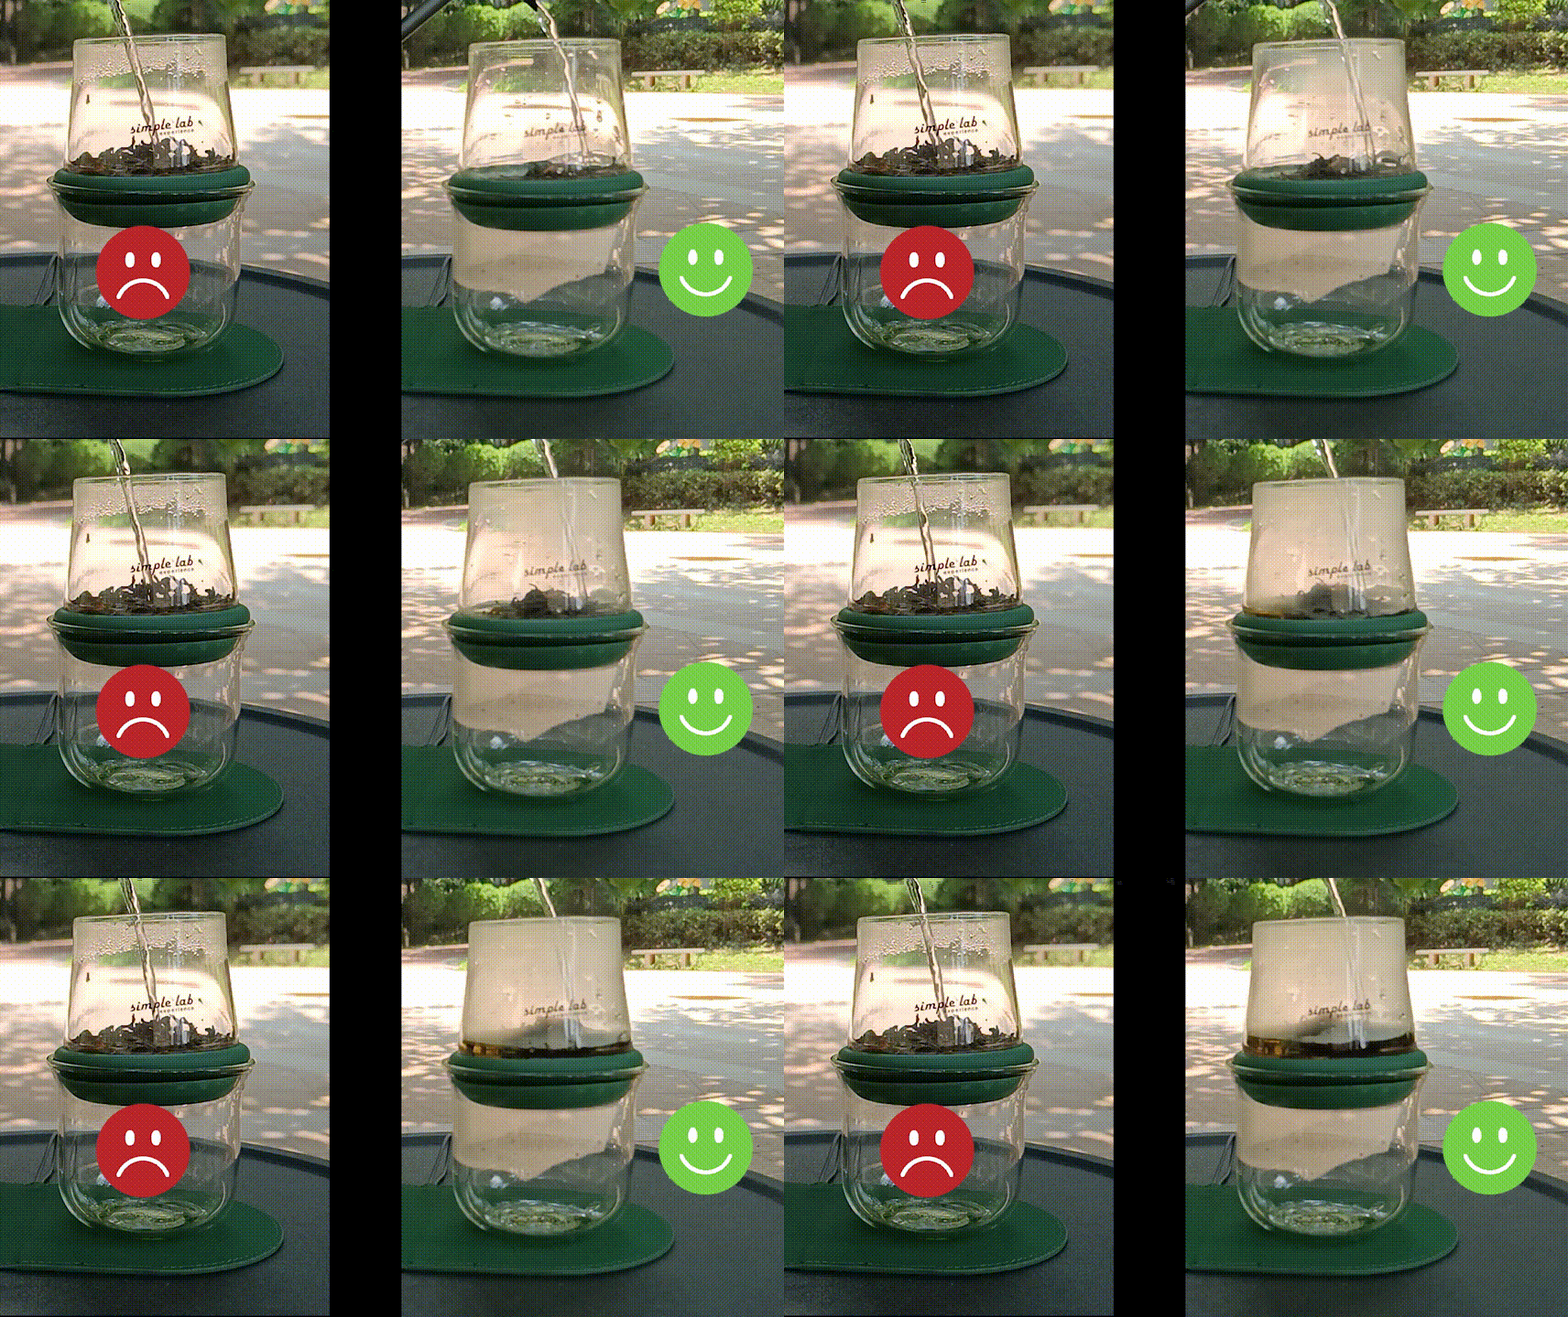
As a simple physical principle, the air trapped inside the lower glass during the brewing process will expand due to heat and find a way to escape before breaking the pressure balance and lifting the upper brewer up. The filter mesh is the designed passage for the air to go through. So, when pouring in the hot water, please avoid the center mesh area to leave some space for ventilation.
In certain occasions, the silicone piece may be slightly deformed by packaging. If so, a brief "hot fitting" process, as shown below, would help. Please fill the lower glass with hot water and leave it to cool down before use.
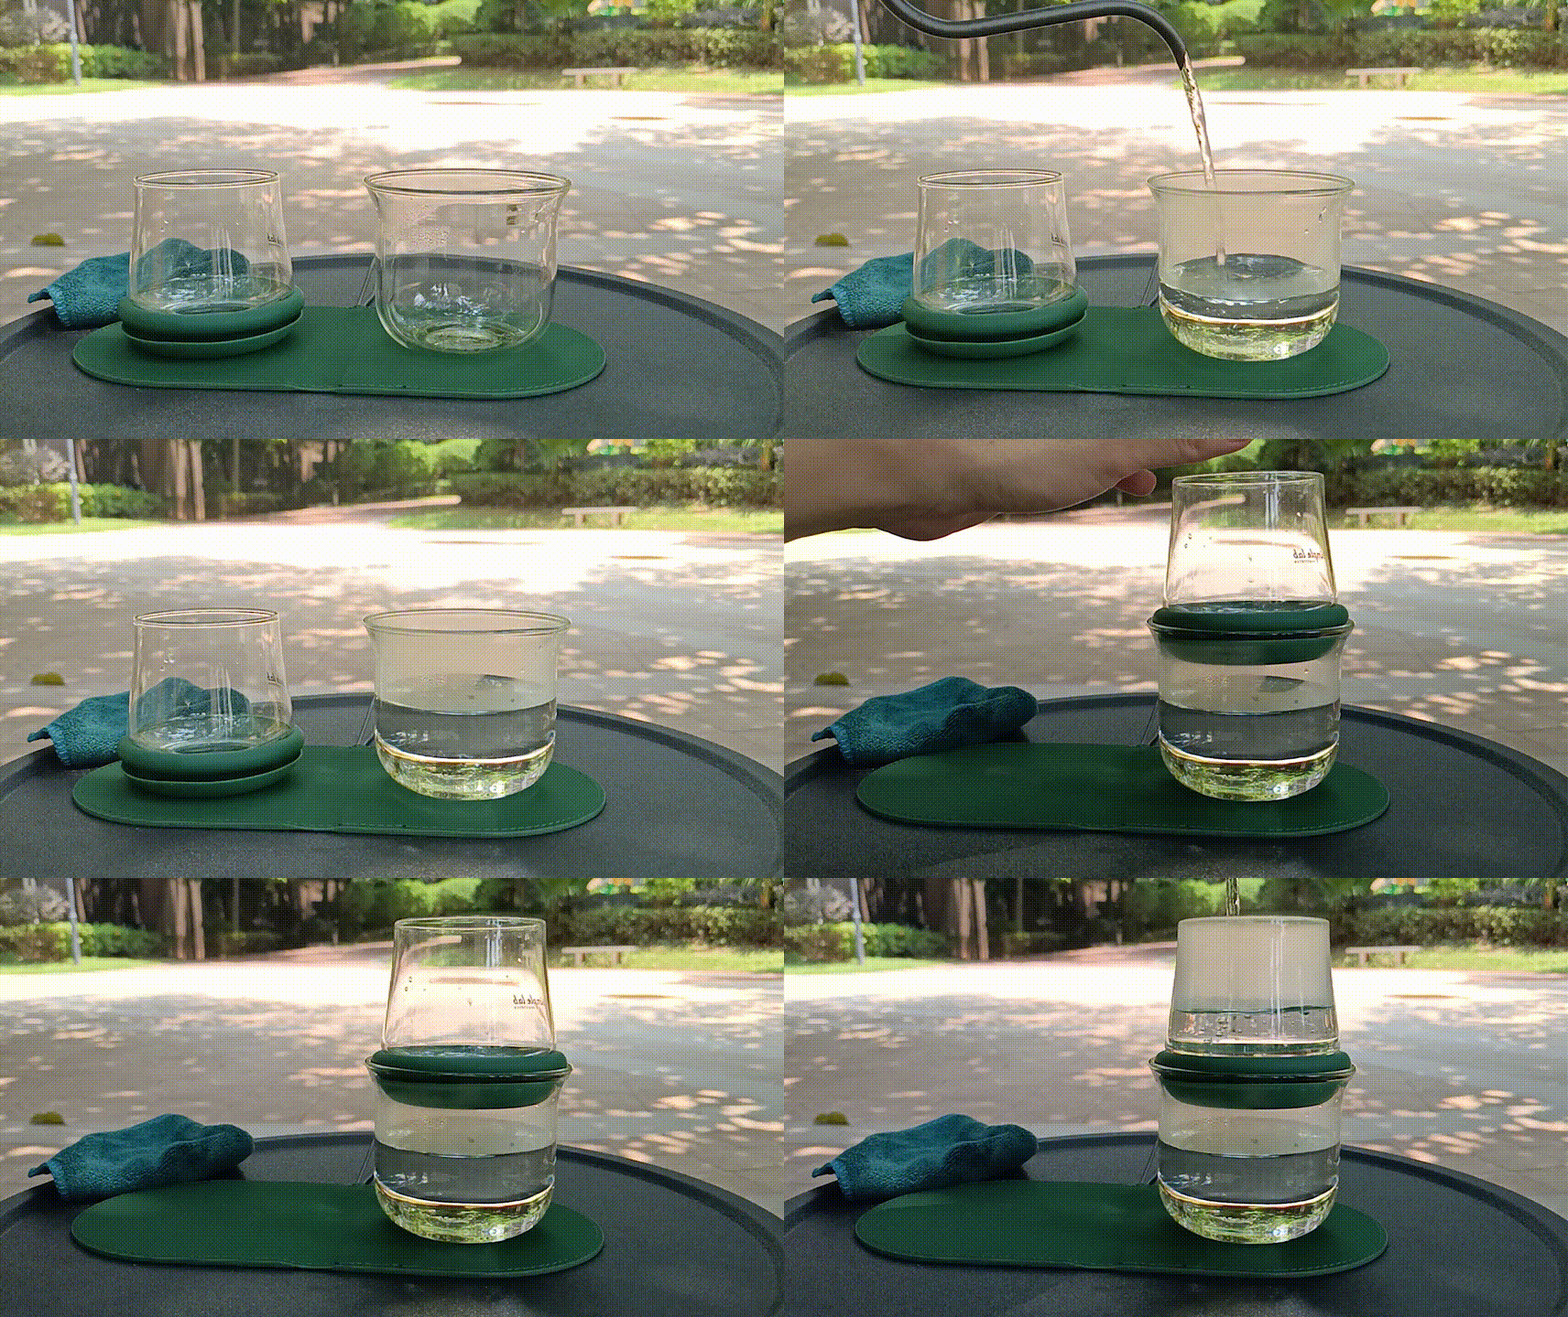
(Fill the lower glass with only half the volume to leave enough space for water from the upper brewer.)
Filter Swapping
To swap the filter, please wet the silicone piece with water before disassembly. Water is a very effective lubricant in preventing the filter edge from cutting through the silicone.
We have tried many attempts to find the best possible procedure for disassembling the filter from the silicone holder. The best way so far is to flip the silicone outward to enlarge the internal circumference and push out the filter with one finger.

To reassemble, fold one side of the silicone piece and press the new filter in, then rotate and repeat the process until it's fully installed. It is important to use PRESS instead of SLIDE to protect the silicone piece from being cut by the stainless-steel filter.
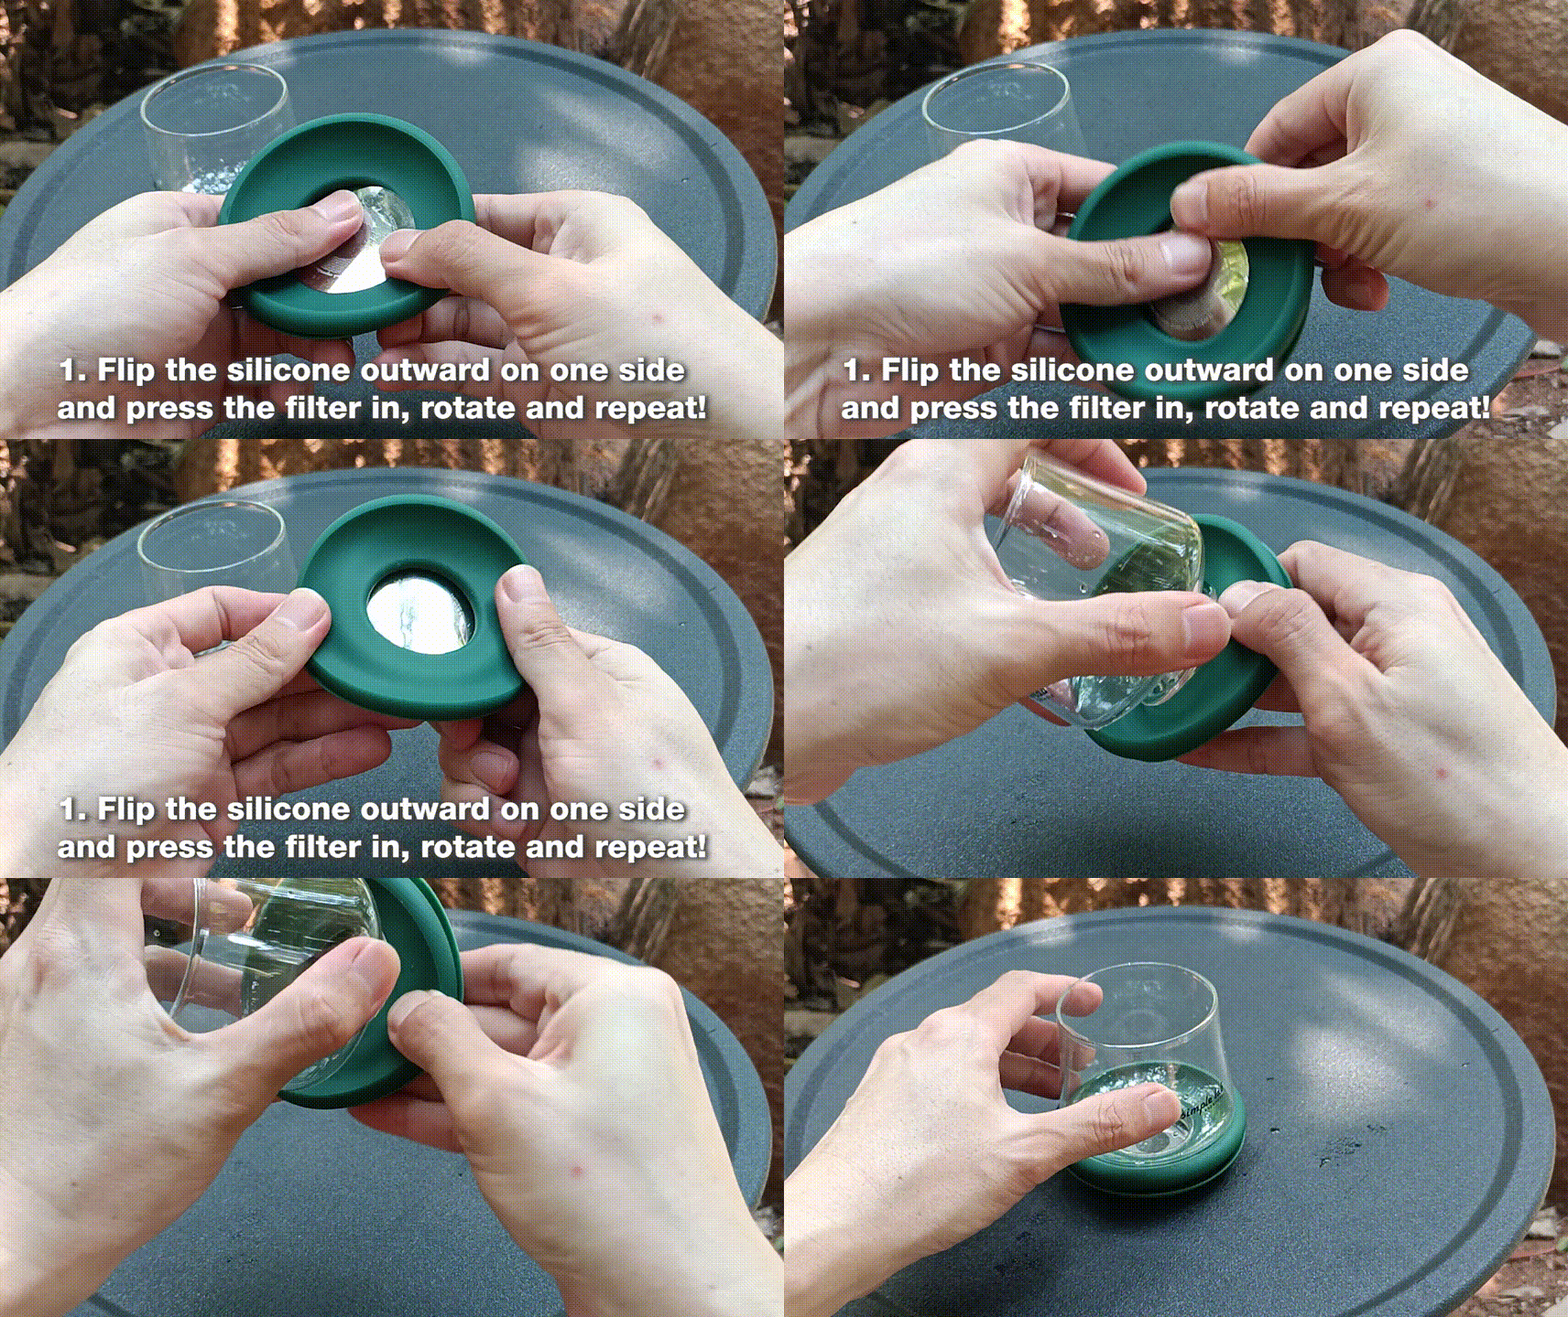
Please note that disassembly is only needed when deep cleaning is required after prolonged use. Frequent disassembly and reassembly may cause the stainless-steel filter to bend slightly, although it won't affect its functionality. Additionally, the silicone piece may get accidental cuts by the filter as well.
For daily use, a simple rinse with running water is more than enough. If you feel not confident in disassembling the filter, you can disassemble the glass only and let the dishwasher do the rest of the cleaning work.
Hot to Handle?
Lower Glass: The flipped-over rim is designed to allow users to hold the cup with their fingertips without burning their hands.
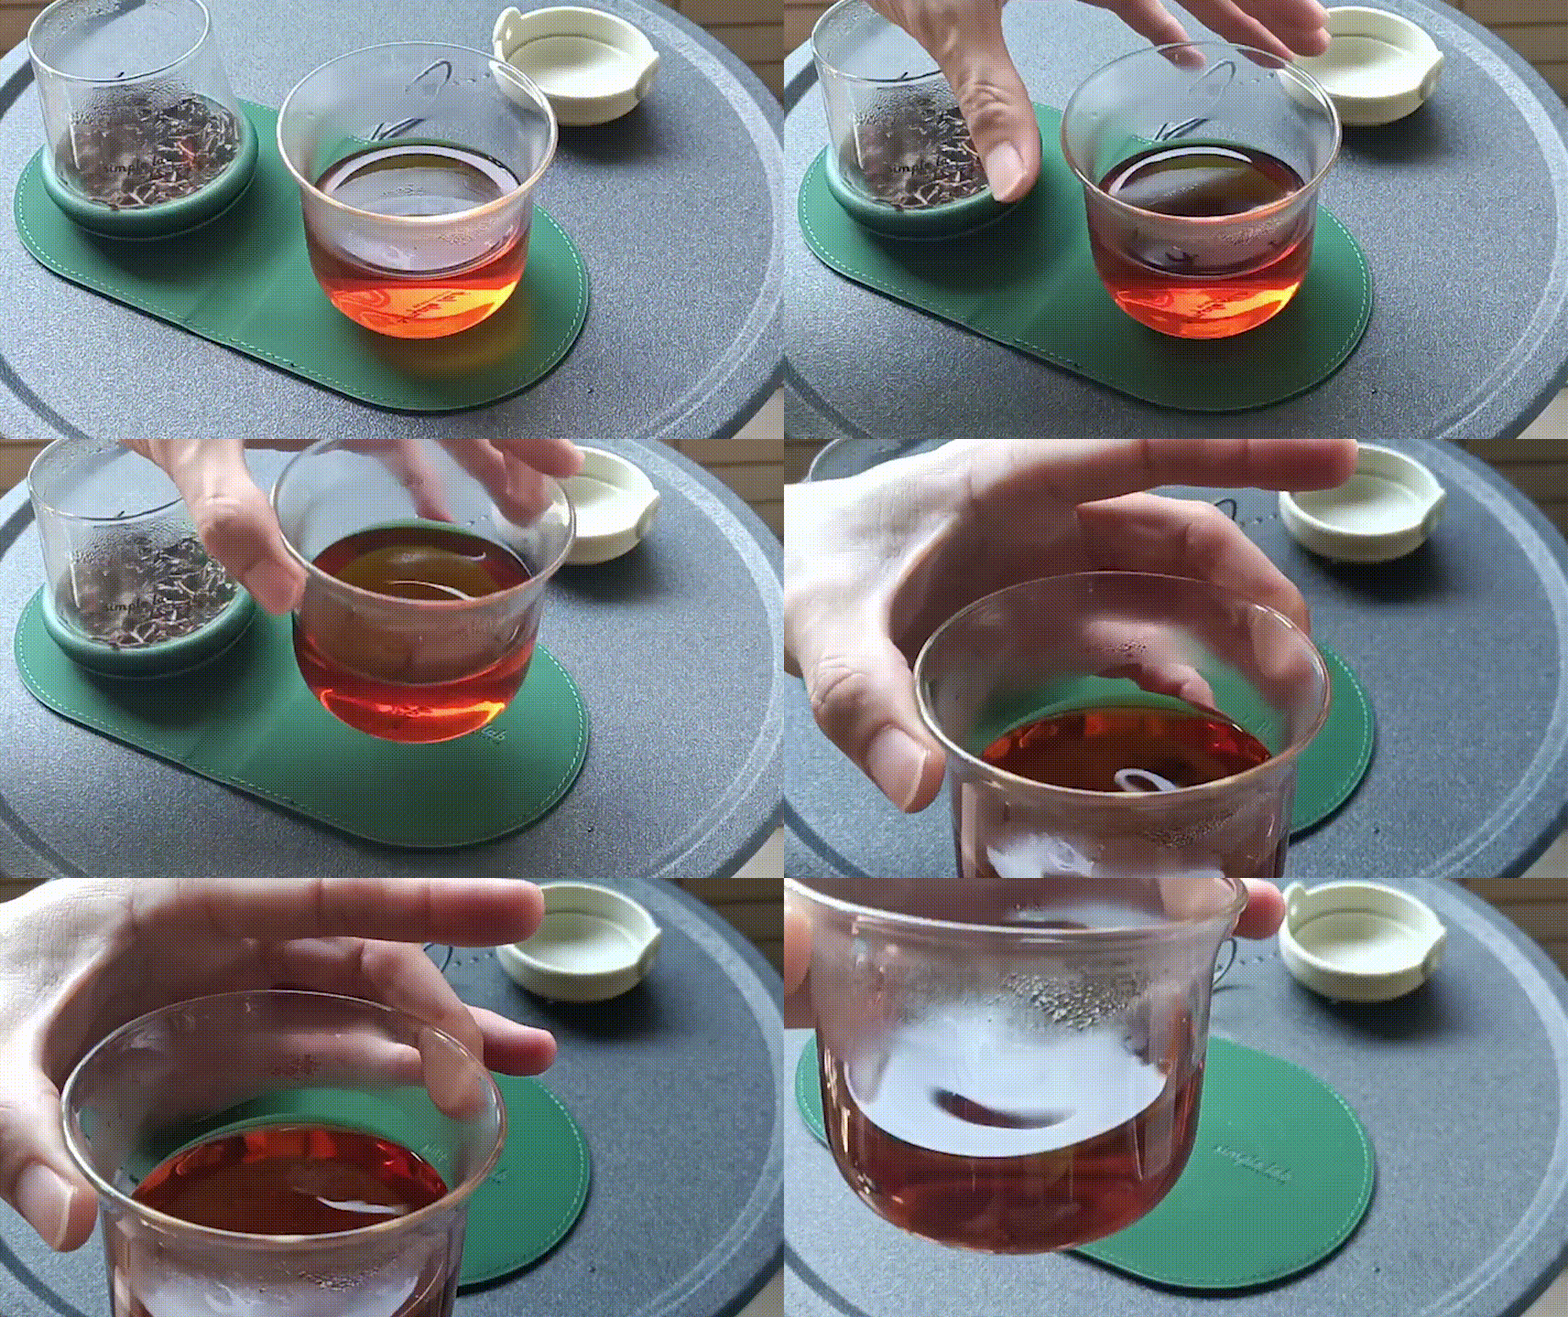
Upper Brewer: To stop the brewing process, you only need to break the pressure balance by simply tilting or lifting the upper brewer, without having to hold it for a long time. When brewing under 150 ml, there is still around 2 cm of clearance from the hot water, making the brief grip a very safe operation.
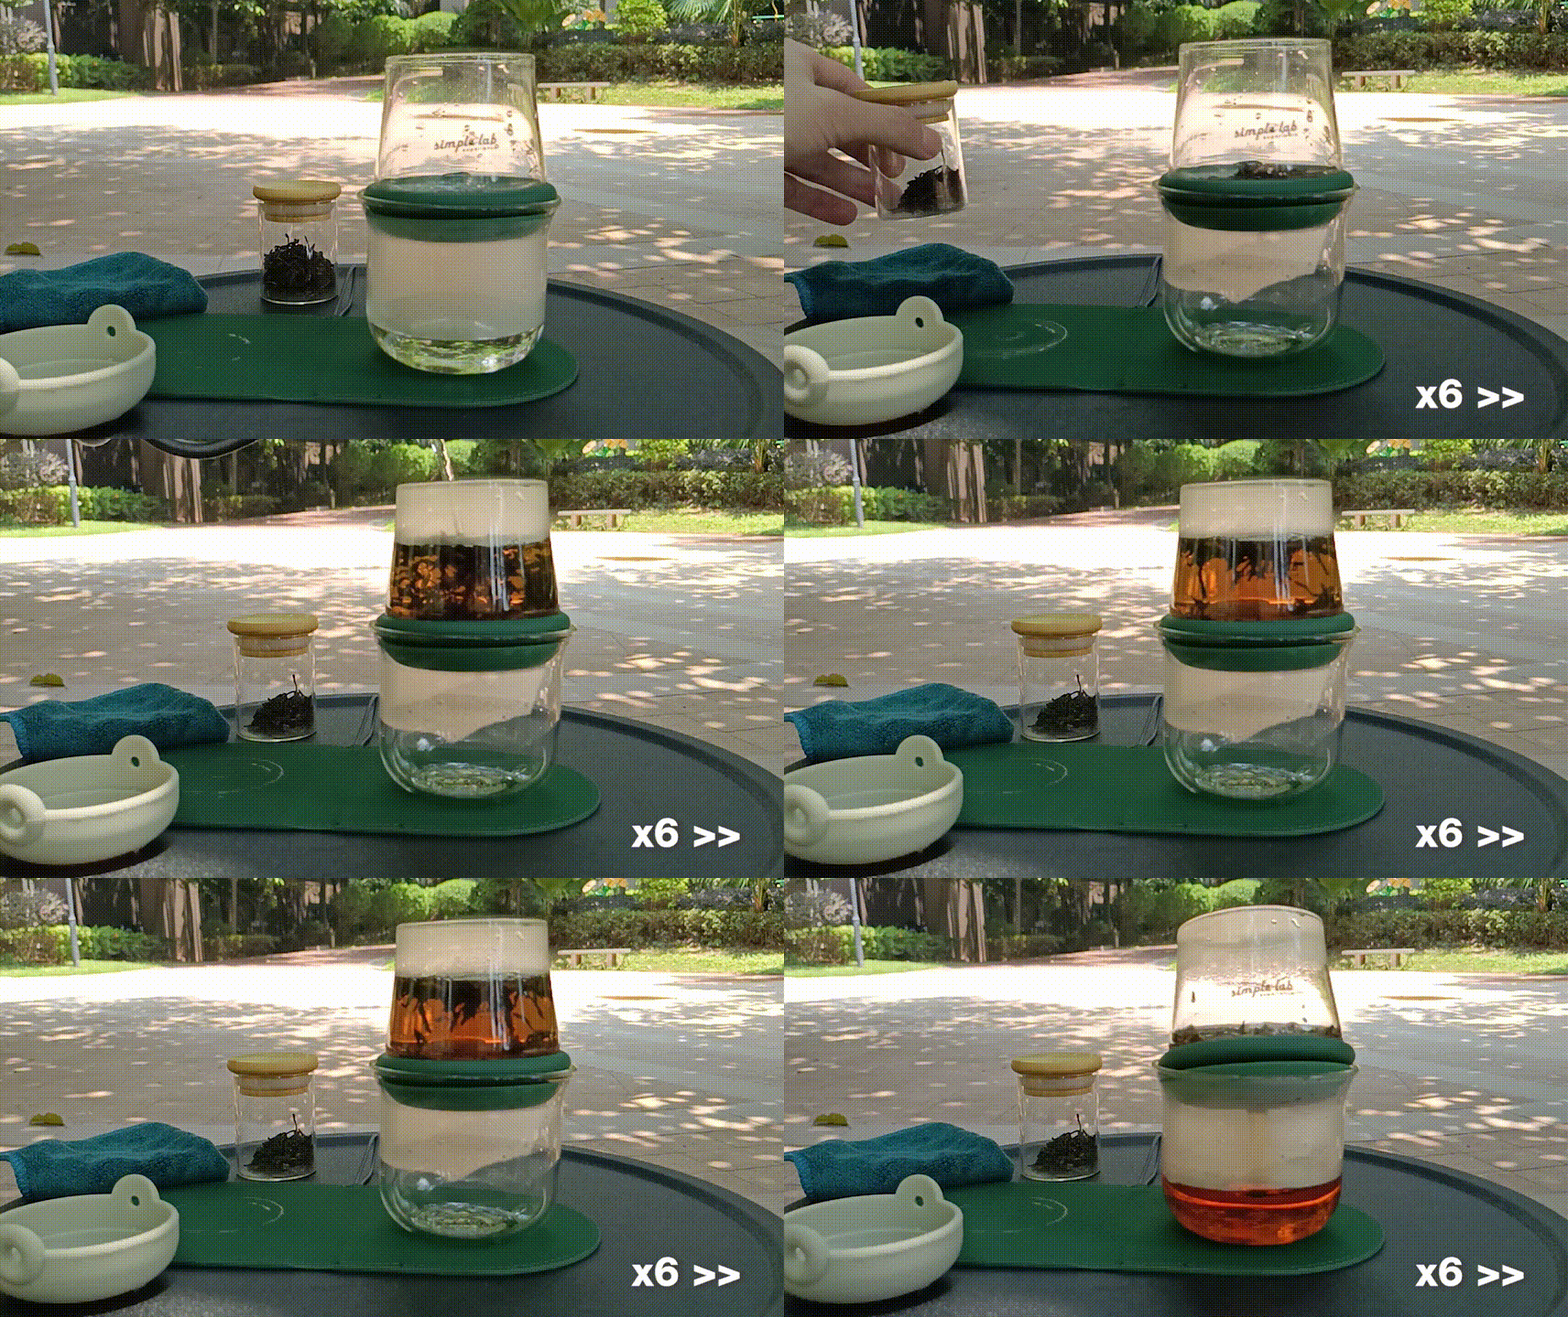
If you brew over 150 ml, to avoid finger burns, please use the grey silicone cap provided. The two rings on the side provide sufficient insulation and prevent slippage. (Please note that water acts as a lubricant between the silicone rubber and glass, making it very slippery when they are wet.)
